Requirements
Your notebook must have Wi-Fi and WPA support, and you must have administrator rights.
Automatic Connection
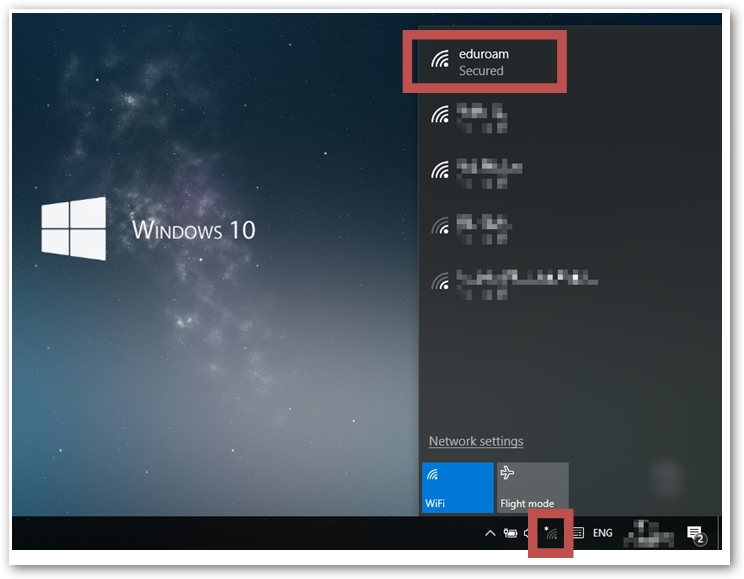
How to find the Eduroam-Network
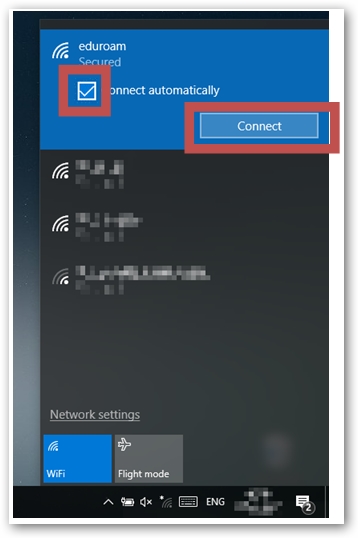
Make sure that your Wi-Fi is turned on and you are on the desktop screen. Open the network list by clicking on the symbol.
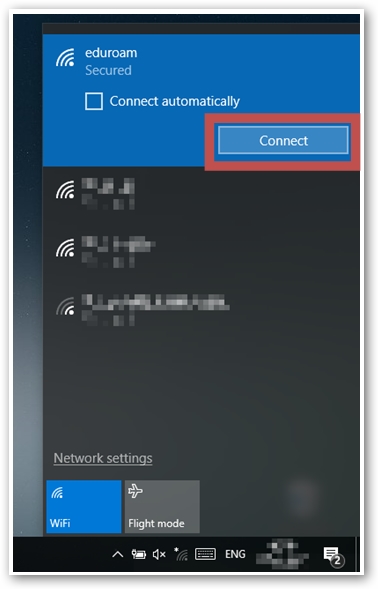
Set up Connection
Click on the “Eduroam” network entry with the mouse and then on “Connect”.

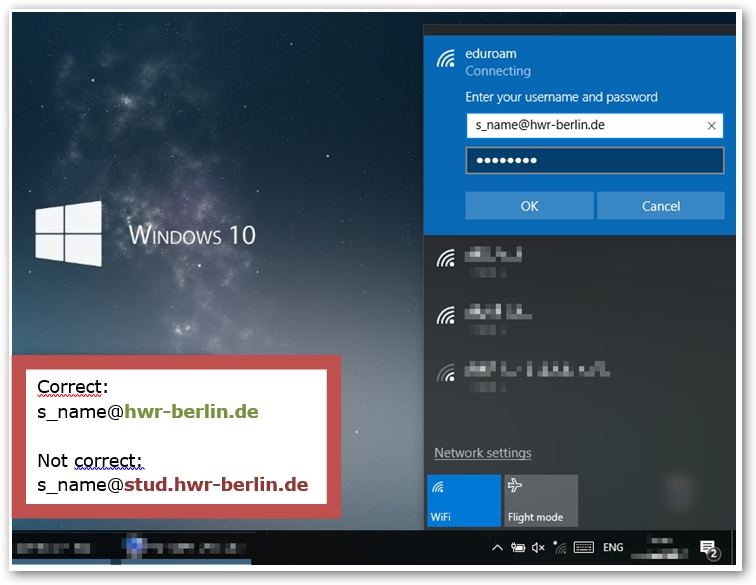
Enter your access data and press “OK”.
The domain “hwr-berlin.de” applies to the Eduroam registration for all users – there is no “stud.hwr-berlin.de”.
The connection is established. The WLAN symbol should be visible at the bottom of the taskbar
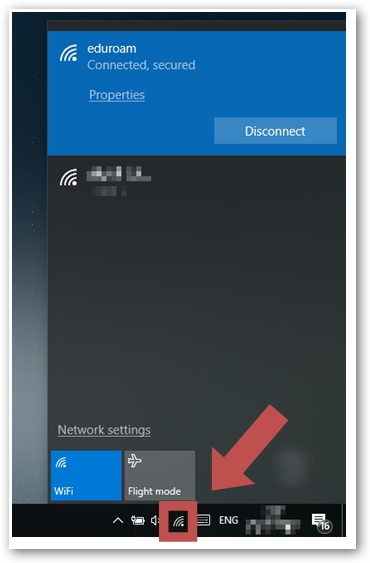
If you want to use the Wi-Fi regularily, it’s recommended to use activate “Connect automatically” option.
Manual Input
Your computer needs a wireless connection with WPA capability. Also, you need administrator privileges.
Open Network and Sharing Center
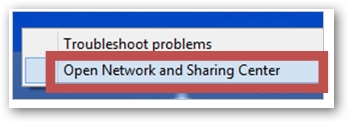
Open the Desktop view and right-click the WiFi symbol in the System Notification Area. Open the Network and Sharing Center.
Create a new connection
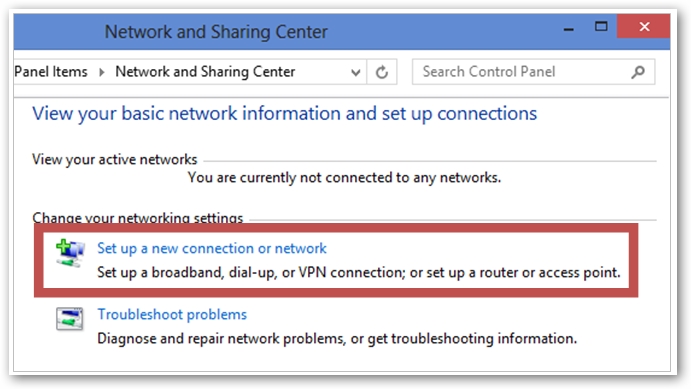
Choose the Set up a new connection or network option.
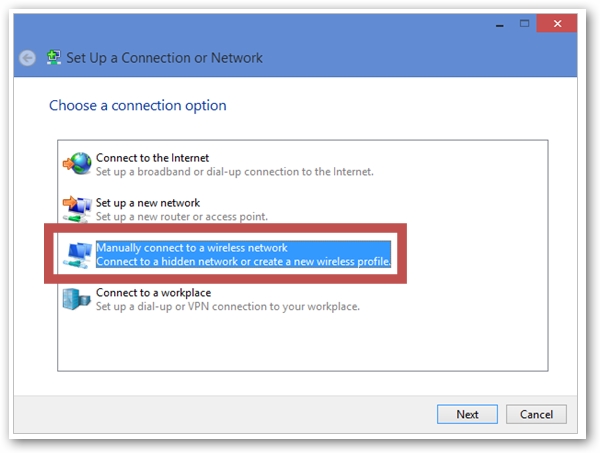
In the opening window, choose Manually connect to a wireless network and confirm with Next.
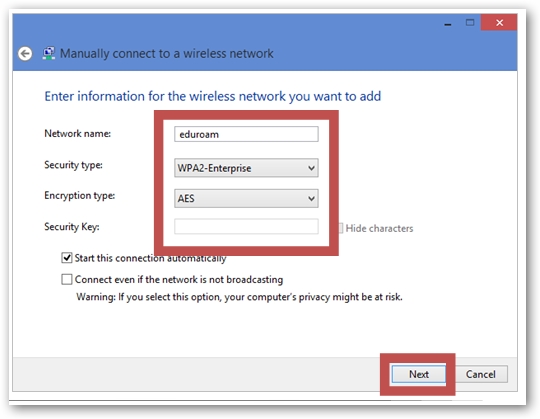
Enter connection information
Here you enter general information for the network.
As Network name, enter „eduroam“.
Choose “WPA2-Enterprise” as Security type and “AES” as Encryption type.
Confirm with Next.
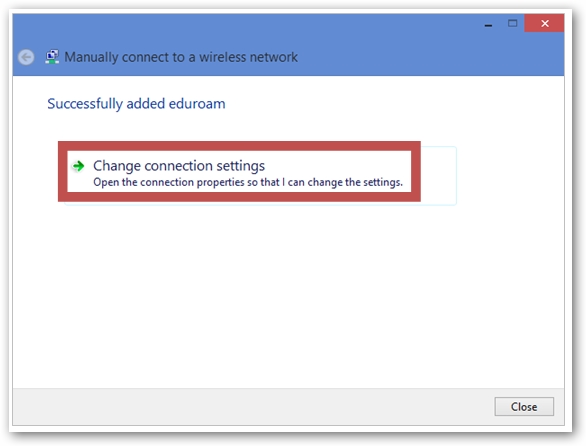
Change connection settings
You should see this message of confirmation of the creation of the wireless connection.
Click Change connection settings.
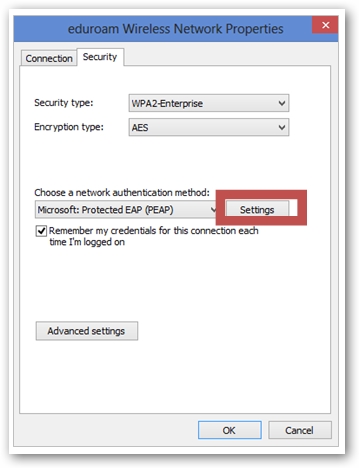
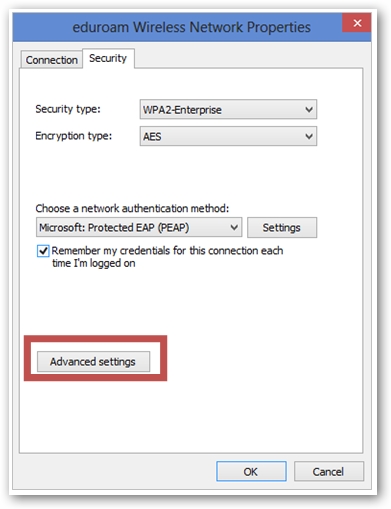
In the opening window, choose the Security tab.
Here you can check again if the security and encryption settings are set as described in step 3.
Then, open the Settings.
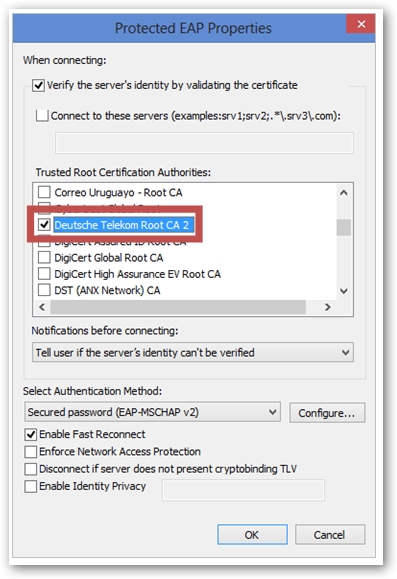
Change Protected EAP Properties
Please make sure that the Validate server certificate checkbox is marked.
In the Trusted Root Certification Authorities list, please mark the “Deutsche Telekom Root CA 2” entry.
Then, click Configure.
In the opening window, please unmark the checkbox if necessary and close the dialog and the Protected EAP Properties windows with OK.
You should now see the eduroam Wireless Network Properties window again.
Click Advanced settings.
Activate User authentication
In the opening window, mark the Specify authentication mode checkbox.
Choose User authentication from the list and close this and all other windows with OK.

Hint for connection problems:
It is possible that the connection will only be established if you choose „TKIP“ as the Encryption type (see step Change connection settings)